Links
Tags
An Arcade Machine of Sorts
About a month ago, I posted about testing out a P5 Panel I'd acquired during an end of financial year sale from one of my go-to suppliers. This weekend, I've had a chance now to do something a little more permanent with those panels by building an arcade machine. As my son becomes a little more interactive with things, it'll be a fun way to program a few little games for him to muck about with.
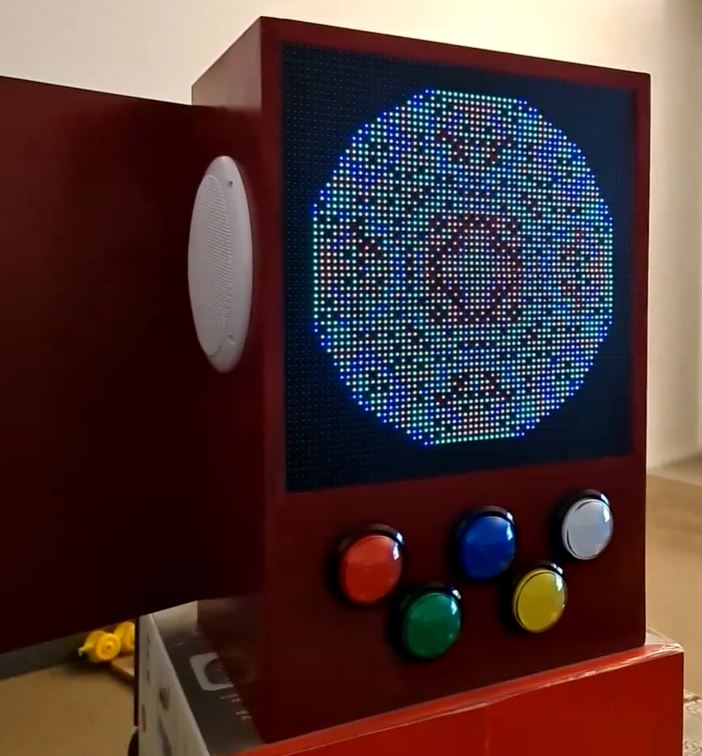
The first step for this build was to pull out my trusty old version of Sketchup 2017 and draw out a basic frame. Inside of this, some 60mm illuminated buttons from Amazon, 2 x P5 Panels and 2 x 165mm marine speakers will need to fit into the chassis. I made sure to also include the width of the MDF when measuring out the box to ensure we're not the 40mm short for the speakers to comfortably sit.
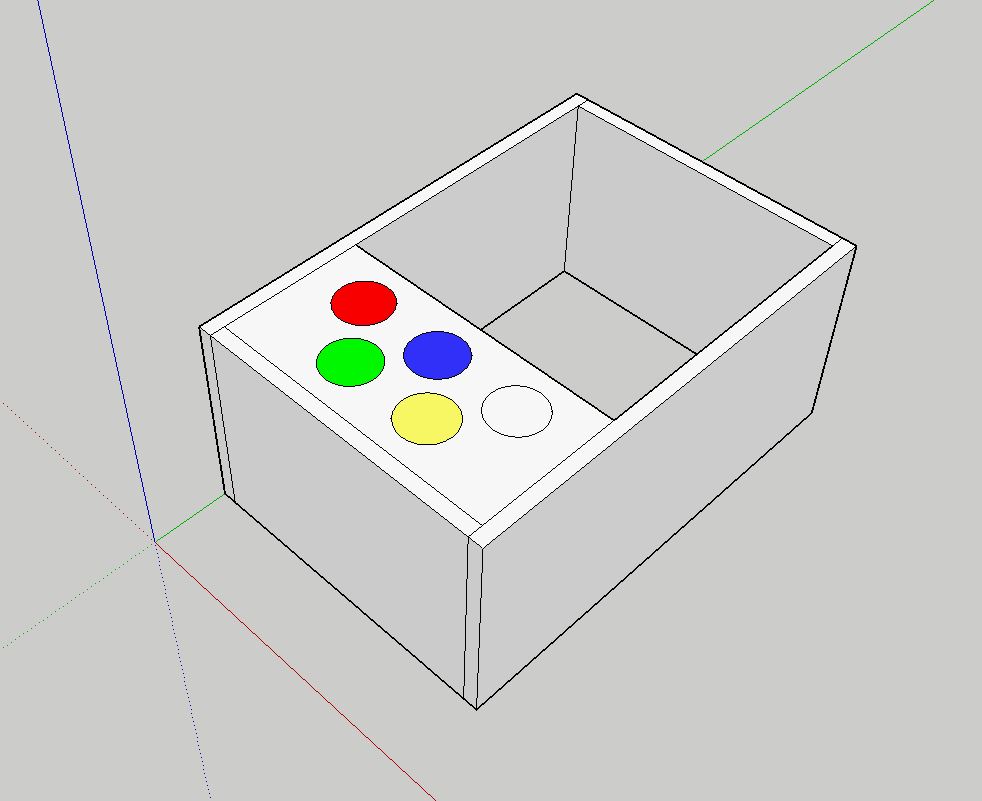
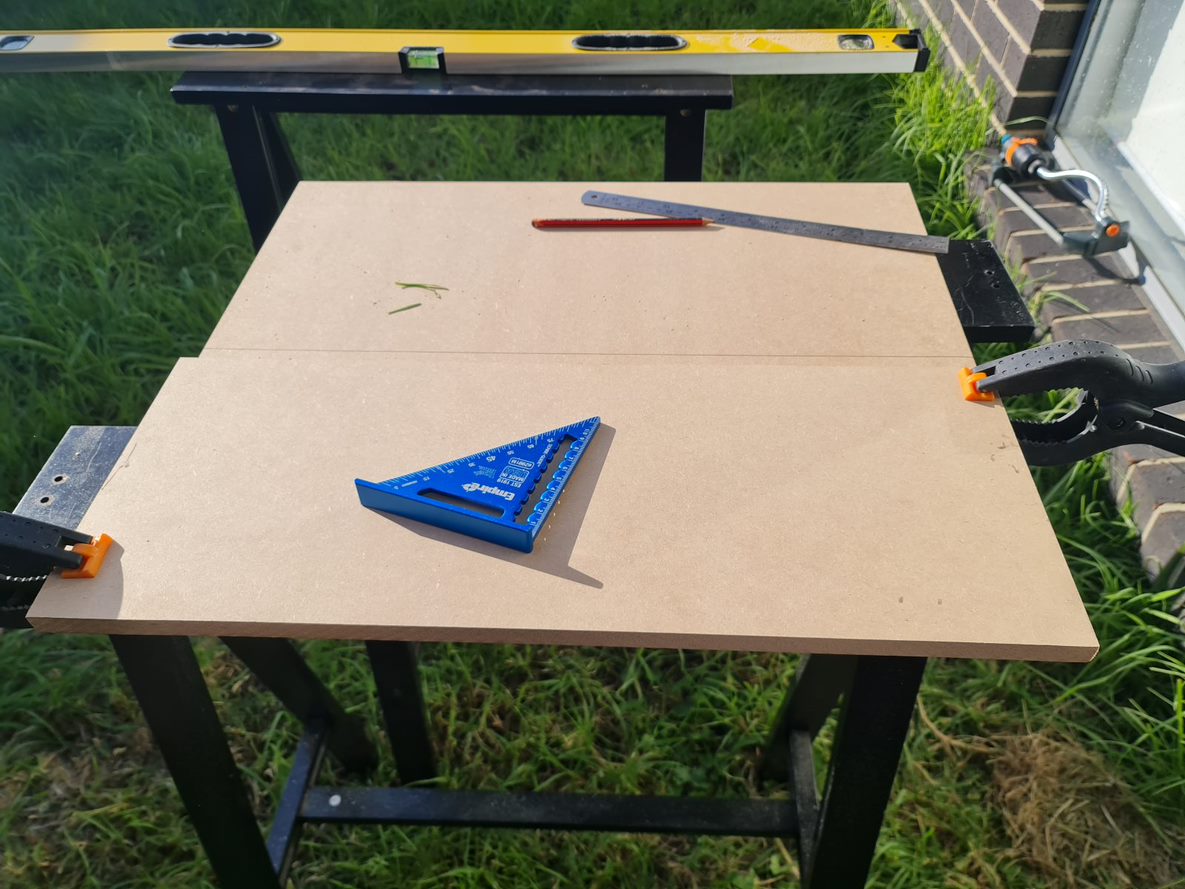
I've opted to go straight lines with this, we can use a routing bit or T-moulding to clean this up later - but otherwise straight lines are going to be infinitely easier to work with here, and will support some vertical mounting later. With each of these panels determined, it was time to go to Bunnings to find some suitable MDF. In this case, it won't be exposed to weather so the ease of working with MDF over Plywood was the deciding factor here, but you could quite easily go the Plywood route if you wanted something a little more solid. I got some 1200mm x 600mm x 16mm MDF (as T-moulding usually comes in 16mm), some red spray paint and got to work cutting the panels out.
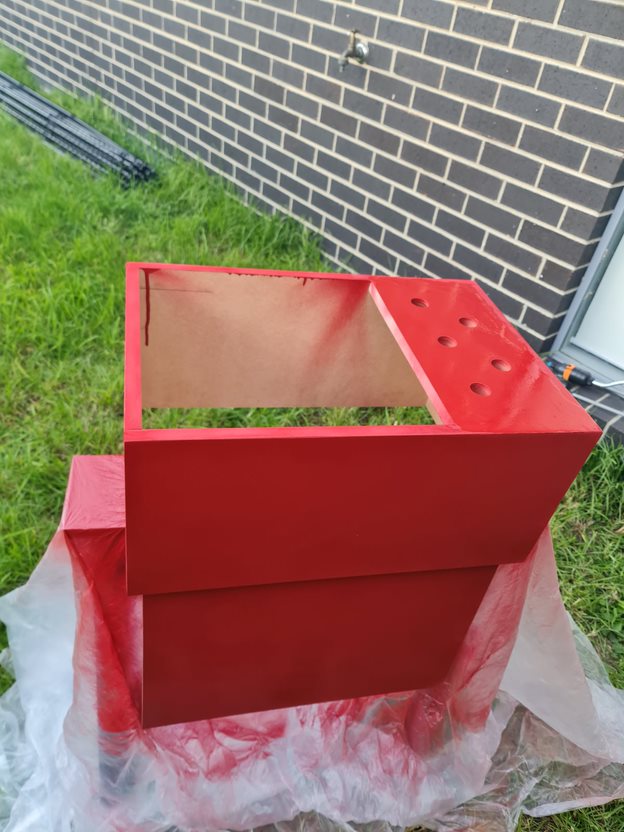
Yeah, that lawn really needs mowing - but given how wet it's been around here, it's been near impossible to find a good enough day that won't involve mud flinging from one side to the other. That aside, once it was all cut out and sanded back to the right size, some drilling + wood screws got the box assembled pretty easily. I used a hole saw bit with the drill to get the holes in for the arcade button - taking care to drill the pilot hole first, and cutting about 50% of the way in first before finishing from the other side. The advantage of doing this is you won't end up with any chipped wood as a result of the final bit being cut off (lesson learned from a previous arcade project!). All assembled to ensure things fit, it was time to get the wood filler to patch any holes before painting.
With the components all fitting nicely, it was time to print some joiners for the screens so that they line up as good as possible, while giving me something to screw into the chassis. Thankfully, someone had already designed some joiners so I didn't have to go out of my way to design them myself. With those on the printer, I had to make a door for the back and add some hinges. With that out of the way, it was time to paint. Now, I suck at painting - I can never get the right amount of spray paint on this. I was doing well until the final coat - but overall it's a nice colour - given my son's favourite colour right now is "James".
After a few coats of paint and an overnight dry, it was time to cut the holes for the speakers out by drawing a circle around 135mm diameter. Now, I don't have a protractor but I did have a ruler with a hole and a screw - so I was able to fashion something out of a ruler, marker and screw to draw a circle. With a large drill bit and a jig saw, the hole was in place and ready for installation.
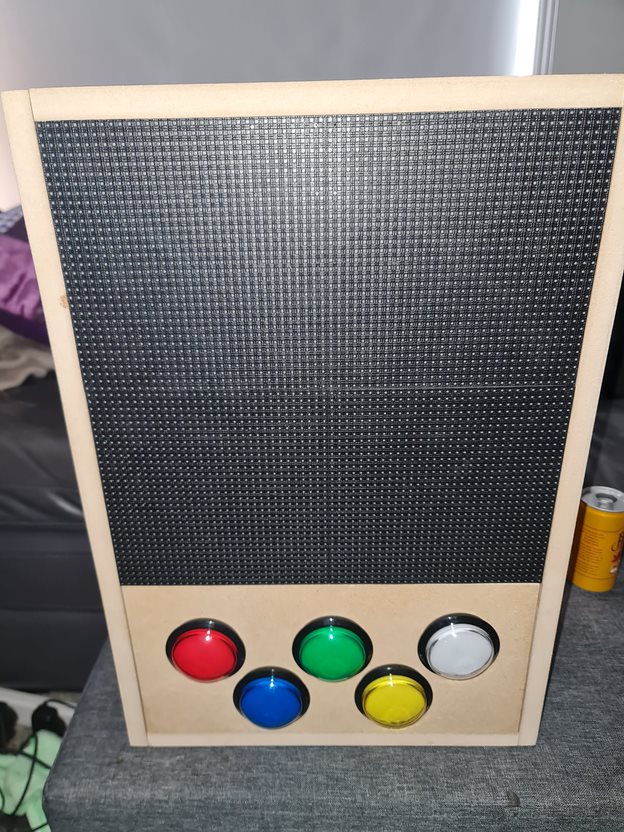
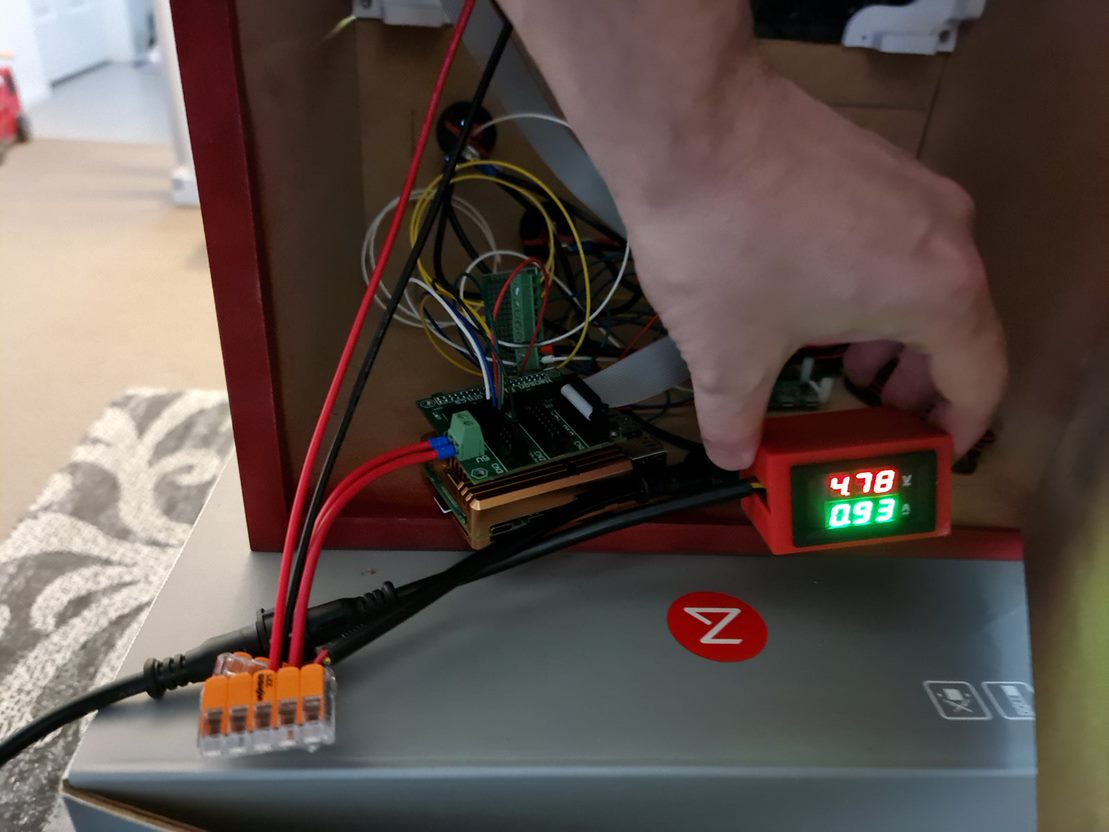
Ok! This is starting to look pretty cool, still need to wire up the buttons and speakers. To do the speakers, I'd ordered a super cheap 50W amplifier board from Amazon while waiting for some slightly better ones to come along. This would allow for the marine speakers to have enough 5V juice to make some noise. Despite some crackling, the speakers are pretty good for some cheapies from DJ City. They'll do for some outdoor speakers mounted inside some resin rocks I'm planning for later in the year! I won't link the amplifier here, but any TPA3116D2 based amplifier will work here. With that wired in, I had a few USB sound cards in use here for a Raspberry Pi Zero. As the P5 Panels need the hardware pulse that is normally reserved for audio (otherwise you get lots of flickering), it's not a problem to use whatever USB sound card you might have lying around. I guess you could use HDMI audio if you can get the right converter.
For the button wiring, I had been using the rPi-P10 controller from Hanson electronics. You can of course wire this in manually if only using one chain, but this board does include some level shifters (3.3V to 5V) that will come in handy shortly. Unfortunately, the use of the level shifters means we can't detect any button presses. After jumping on the soldering iron, I'd pulled out a small PCB, several terminal connectors, used a tall-header GPIO Pin Header (to allow hat stacking), and wired on some Dupont connectors for lighting up the LEDs for the buttons individually. In hindsight, I might have replaced the buttons with some WS2811 LEDs to control the colour as well, maybe a future project than the LEDs with resistor values for 5V.
The rPi-P10 board is wired using this diagram - so reverse engineering it, I had determined I'll use the slots reserved for the second chain for the LED lights, and the third chain for buttons. I had confirmed the pinout works per the document before cutting away at pins. In the end, I had chopped 5 legs off the stacking connector so that they wouldn't pass through to the rPi-P10 hat for the buttons, and using Dupont connectors found the right R0/G0/B0/R1/B1 pins within the second connector so I could take advantage of the 5V level shifter on this board. You could simply use a level shifter and build your own board, but this crude board does the job for now. In the coming month, I'm going to give KiCad a go for this board and check out a process using JLCPCB or PCBWay to produce and send them through. It's so cheap these days to get custom PCBs, but it would have helped here to not have jump wires all over the board.
The final step was to wire it up, write some test code to ensure the buttons all work and to have some songs and pictures show up. Impressively, this set up under normal usage sits around 1A at 5V, so this whole thing is powered for several 10s of hours from a Romoss 30,000mAh battery. I had a Raspberry Pi 4 in at the time to do some debugging with (much faster to compile), but even that kept all lights lit and the matrix running at around that 1A mark (65% brightness). Obviously, the more white on the screen and loudness of the speakers all play a part, but impressive none-the-less.
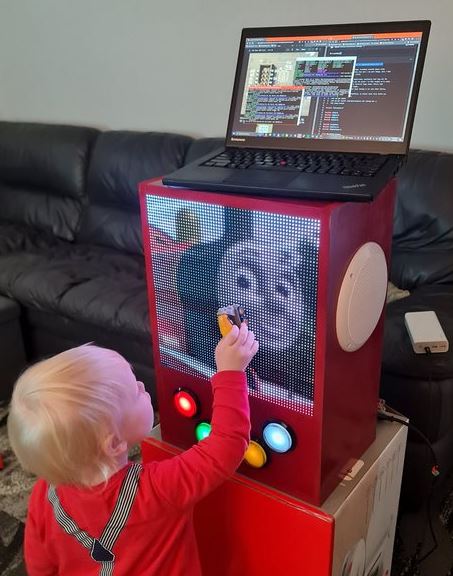
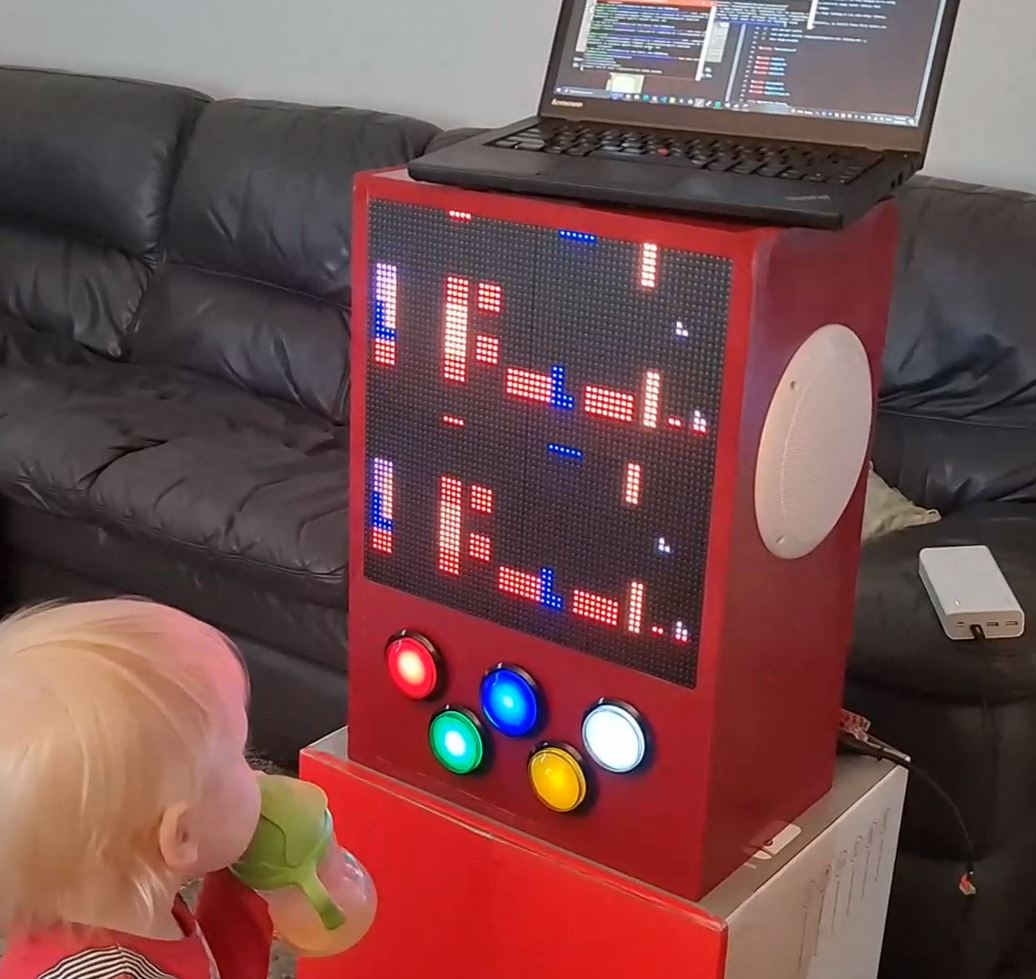
Suffice to say as I sit here on a lazy Sunday afternoon, it looks pretty awesome and kiddo loves it too. Hopefully it'll give my phone five minutes of peace while we can code some things for it such as some low-res PICO-8 games that make use of the buttons.
Solving Cat Problems and Watering Systems with a Raspberry Pi and Machine Learning - Part 1
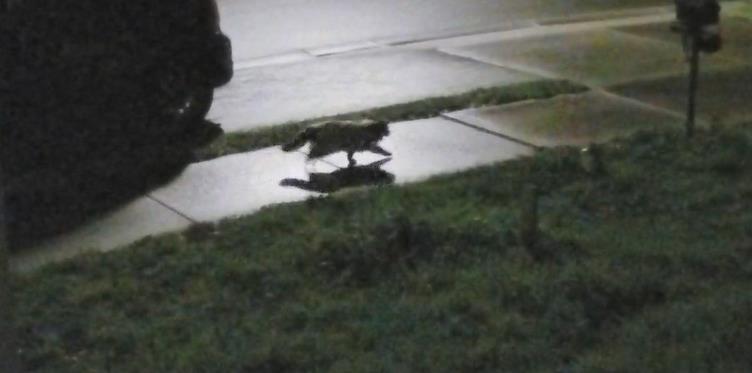
I have a son who is now 11 months old and other family members that are allergic to cats so when a neighbourhood cat decides to defecate on the lawn, not only does it smell awful but it poses a number of health implications too. Some of the cats have also taken to climbing up the fence and jump around the roof - waking up everyone at 2:00 AM in the morning. Because it's more than one cat, it's hard to know whose cat belongs to who and the local council wants some $70.00 per cat trap to hire - and that's when they're not all out on loan anyway.
This got me thinking about the ever-growing pile of Raspberry Pi's that I had in my draw for several years. I hadn't really got into GPIO's beyond a couple of 'light an LED' scenarios - I never really had any projects go 'in-flight'. There's always the idea of building a set of Flight Controllers but with various life changes that project has been on the backburner for some time. I also hadn't had much of a look into Machine Learning beyond a few image recognition proof of concepts as I had no real use case for it, until this problem.
One thing cats really hate is water. I figured that if I could get a remotely controlled Solenoid, activated by the front door camera if I can detect the presence of a cat, then this might be a more humane way to scare the cats off. It'd of course only need to trigger for a few seconds until the cat has gone - and using a Raspberry Pi might be well overkill for it, but offloading the capability might reveal a good result.
The shopping list
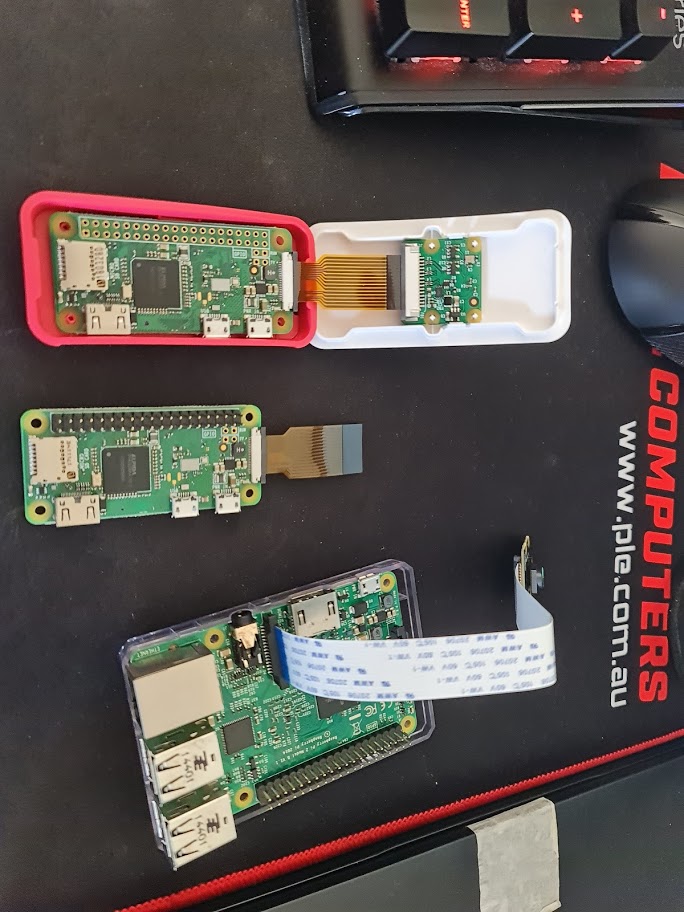
Back in April, I took stock of the parts I had. Several Raspberry Pi Zero's (that were to be used for the controller project), some Raspberry Pi 2's and 3's, a Raspberry Pi camera, some crimpers and that's really about it. I jumped on Amazon and Core Electronics website to buy some parts. By the way, if you're following this to build your own - I'd strongly recommend not just buying everything in the list - I really didn't plan this part well and probably bought some unnecessary equipment here.
- 3/4" Solenoid Valve for connecting the garden hose to.
- 4 Channel Relay Board for the Raspberry Pi.
- Lots of Dupoint Wires and other hookup wire
- 8 x AA and a 9V battery holder
- DC Barrel Jacks
- Terminal Blocks
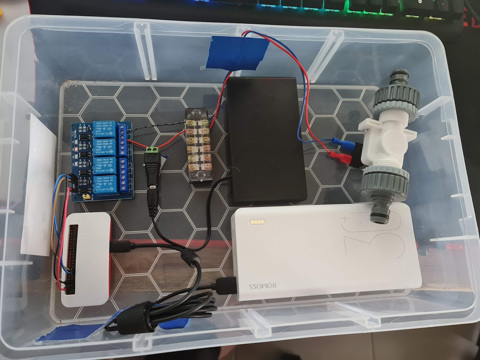
This would be a bit of a stock pile such that I could begin working on "something".
The first build, kind of...
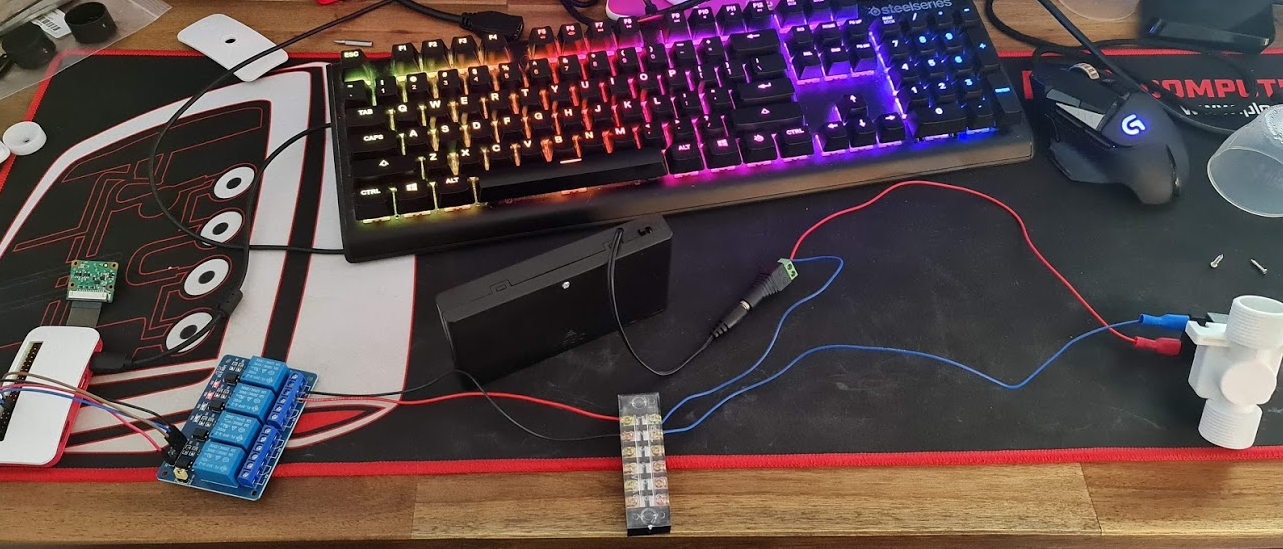
The package of miscellaneous parts arrived and I got to work stripping some wires, putting some crimp terminals and spades on the end of wires from some surplus auto equipment I had lying around. I've also connected some cameras up to get started with some kind of ML. My desk looked like the below for a few days.
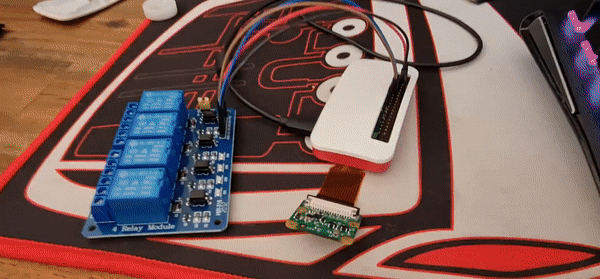
I'm mildly excited at this point - having had to fight Python and dependency issues, I've managed to get a small script to turn on and off some pins working on the dreadfully slow Raspberry Pi Zero. I mean, who knew that having Python 2.7 and 3.5 on the same distribution would cause as many issues (do I use pip or pip3, python or python3?). There's a certain sense of achievement you get when you manage to control a physical object. Perhaps it's the sound of a relay clicking and a solenoid *thump* that makes all the difference.
from gpiozero import LED
from time import sleep

hose = LED(17)

while True:
    hose.on()
    sleep(1000)
    hose.off()
    sleep(1000)
The above script won't win any prizes for creativeness by any means, but that's really how simple it is to start turning stuff on and off. I'm not exactly a fan of Python and I dislike YAML for similar reasons. When you get used to C-style syntax, the mark up makes it pretty easy to place code the way you want to see it. It's fair to say I've developed my own preferred styles for laying out code so moving to a different language that also removes some of these "features" can feel unpleasant. But this is where I think I made a mistake.
I figured that I've been working with Typescript for around five years now, surely these examples are available in Node.js. Of course, there absolutely were examples - there just weren't very many of them compared to Python. When you start going down the Machine Learning path on the other hand, things get a lot murkier and in some cases you end up with Javascript wrappers for Python scripts of which are wrappers for C libraries themselves. This doesn't strike me as robust enough to have such a chain of possible failure points. To add to it all, the Raspberry Pi Zero is also only Armv6 capable - Node.js stopped supporting this architecture sometime in 2019. But I know how to write a basic express app in Node.js so I gave it a good go.
Before I knew it, I had imported onoff, lodash, fs, lowdb, fs, cors, nodemon and started scaffolding some API endpoints. After all, any logic I have that detects images from a camera will need to pass detections to an API method - this would allow some abstraction to take place. With Docker installed on the Raspberry Pi Zero, I'd eventually build an image based on the balenalib/raspberry-pi-node image.
NB: Which by the way, if you're trying to build containers to run NodeJS on Raspberry Pi Zero hardware, the following snippet will be super useful. There was a lot of trial and error to get this exact package and image for the job...
FROM balenalib/raspberry-pi-node AS base
RUN install_packages make gcc build-essential python3 influxdb
A word of warning, it's not a great idea to build these images on the Raspberry Pi Zero directly unless your idea of fun is to spend 30 minutes waiting for all the dependencies to compile and install. If you don't get your multi-stage builds right, this becomes a lot more fun when you have an error further down in your Dockerfile. As I learned through building these images, they are multi-platform by default so building them on a far superior computer and pushing them to a shared private repository was a really good way to handle the compile time slowdown issue.
Suffice to say though, I managed to build something that would respond to commands like:-
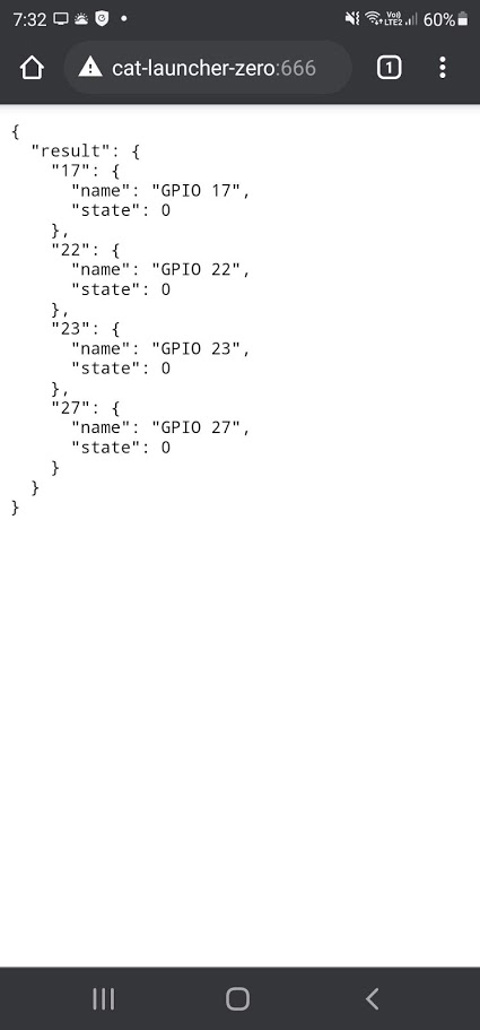
- /gpio/{pin}/{state}/{timer?} - where pin = GPIO Pin number, state = on or off and timer = how long (0 = indefinitely).
Pretty simple stuff. Or at least I thought it was. Things kind of worked - you need various levels of privilege escalation to get this thing working but perhaps the biggest issue was that I'd just spent a lot of time coding something that really didn't need to be this complicated. But it did work, so I put the image into a Docker Compose script, set to always run and loaded it in a box.
Machine Learning
Before, I mentioned Python having a good set of resources available especially when it comes to tinkering about on a Raspberry Pi. Having powered up the Raspberry Pi 2 I had lying around, I connected the camera to it and ran a few example Python scripts on it to see what kind of framerate you could expect - having not done much with Object Detection beyond a proof of concept project at work with Amazon Rekognition.
The first example I downloaded revealed some success - it wasn't overly fast, maybe 3-4 FPS but it could pick up some things like monitors, chairs and teddy bears. I wish I had kept a photo of this one.
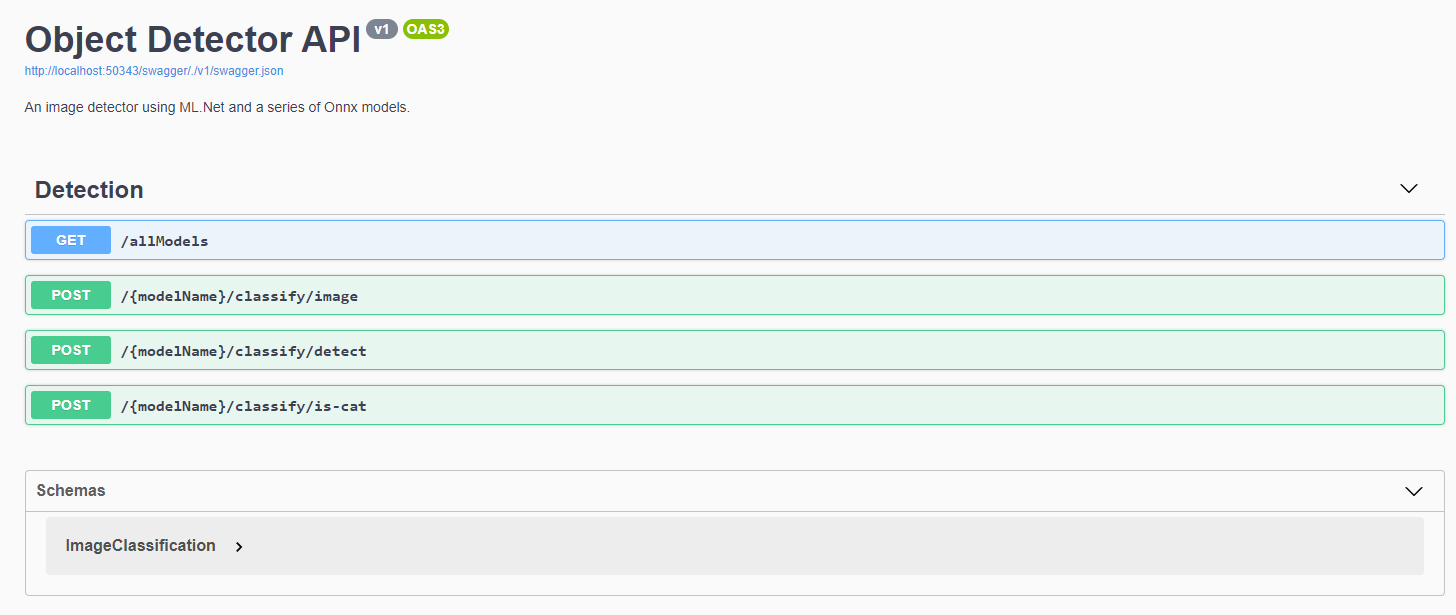
All well and good if I want to use this particular library and run the application on the Pi itself, but it definitely wasn't great at detecting cats nor was it very fast at doing so. If I'm going to start writing some serious logic - it's time to do some learning. Microsoft had recently announced ML.Net having a feature update and I figured instead of learning more Python, I could put some C# skills to use. I stumbled across some examples on getting TinyYOLO v3 running on ML.Net using Onnx. There's a lot of material to cover here, perhaps for another blog post. But if you're starting out in Machine Learning and think reading this one example is going to solve all of your Machine Learning queries, you'd be absolutely wrong.
When I started implementing pipelines, using Neutron to work out how to invoke the model and learning about how to reduce image quality to speed up image detection - it becomes overwhelming very quick, and most of your object detection labels and the way scores are calculated changes dramatically. Different settings start to throw out bounding boxes and even what's actually being detected. None-the-less, I'm only interested in "Cats" and "not Cats" - so I figured this should be relatively straightforward. With my API in place and several algorithms, it's time to test.
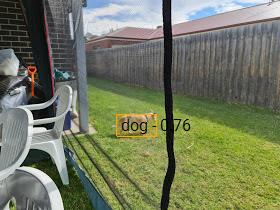
With so much excitement, I begin uploading some images. By about the fourth image, I was immediately excited that the bounding box is perfectly around the dog, and it detected a dog. That percentage could have been a little bit higher, but who cares - it detected the right thing!
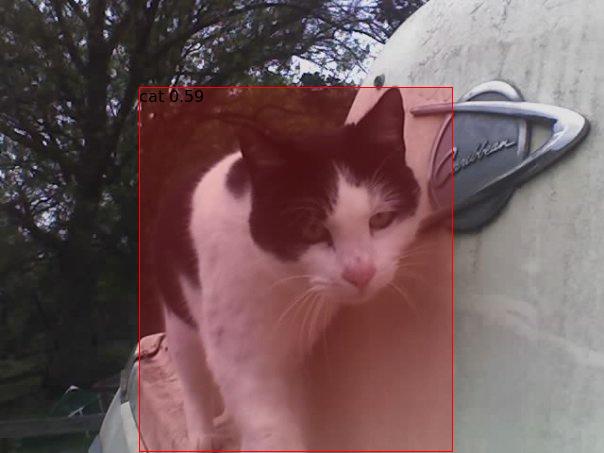
Some more pictures in, and we finally get to a pretty obvious cat from some Aiptek camera back in the day (remember those guys?). The percentage wasn't exactly super high, but you can only see two legs. Maybe that's why ;)
Alright - time to give it something obvious - two dogs and a cat. What do we get? - bzzt. Nothing.
Suffice to say, I went through a lot of different kinds of models to try and determine the best one for the job. Some were slow, some were fast, nearly all of them were only producing < 1 frame per second on non-GPU accelerated hardware. I even had a go at general image classification - and despite only having two kinds of things I was looking for, most algorithms there were basically treating things as "Cat" or "Not Cat" - rather than a whole list of possible outcomes. But - I did have some success so I would proceed to bundling this up in an image with all available models ready for testing.
The RTSP debacle...
It was clear early on that the Raspberry Pi's camera was pretty ordinary. I had however purchased a Ubiquiti Camera - the Bullet G4 and mounted it to the front of house. There's a few cool things that this particular camera supports - RTSP is probably the most important as well as some Motion Detection that I can hook into. All I needed was an RTSP library to get images from the stream (short of writing my own RTSP interpreter - surely I'm not the only person in the world consuming this feed), and I'd pass it onto the detection API before deciding whether I wanted to turn the relay on (and for how long).
Well - this turned out to be an even bigger hurdle than the Machine Learning itself. After traversing through Github and Nuget for libraries, it was pretty clear that RTSP feeds can be vastly different, and most were designed for particular cameras or use cases. In particular, the Eufy camera I had before kept breaking most C# libraries I was trying to use, except for Emgu.CV.
Turns out, this Machine Learning library does have a fully baked RTSP reader and it works fine if you're running everything on Windows. I was not - my servers are mostly Linux and anything Windows are my desktop PCs which are used for a lot of other things (and despite having Solar Panels on the roof for daytime, I don't want to be chewing up that much electricity for the one or two times a night a cat may be detected). Despite following build instructions for Ubuntu, I could never get the library working without throwing many dependency errors.
The Emgu.CV library requires a few dependencies:-
- Emgu.CV
- Emgu.CV.runtime.windows
- Emgu.CV.UI
With these installed, connecting to the RTSP stream is fairly trivial. You create a VideoCapture object, subscribe to the ImageGrabbed event and start the feed. You can hook into various error methods to attempt a retry in case of disconnect but for the sake of brevity in the code below, I've kept it super simple as it's useful if you ever need this, at least in a Windows environment.
var capture = new VideoCapture("rtsp://...");
capture.ImageGrabbed += ImageGrabbedHandler;
capture.Start();
void ImageGrabbedHandler(object sender, System.EventArgs e)
{
var frame = new Mat();
var captureRetrieved = Capture.Retrieve(frame);
if (captureRetrieved)
{
var frameImage = frame.ToImage<Bgr, byte>();
var bitmapImage = frameImage.ToBitmap();
// throw this bitmap whereever it needs to go
}
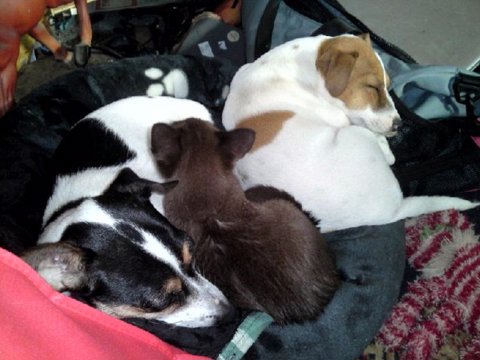
}Unfortunately, this is where the Cat Launcher venture ends. Having installed the camera and attempted some image detections, it's clear the algorithms aren't quite working. In some cases, it was detecting the local neighbourhood kids as 'Cats' from time to time, and 'Cats' as 'Dogs' and various other anomalies. That's not to say all of this is wasted, I'll definitely be picking it up again. But as I headed into Autumn and Winter, the cats don't tend to spend too much time digging up the lawn. Or perhaps the Jack Russell that was staying with us may have helped keep some of the cats away. In any case, until these images can correctly identify a Cat, this project is on hold.
In the meantime, and for my next post - a new project cropped up in May to automate a gardening system. Having installed a bunch of Planter Boxes to grow some veggies, the same kind of system at least without the Machine Learning component is required. So I've pivoted to building an automated gardening system in the meantime. Stay tuned for Part 2!